BIONADE
CINEMATOGRAPHY BREAKDOWN
INSIGHT
This is a quick loock at the Cinematography of the Bionade Spec Commercial.
CREDITS
All: Jannis Newiadomsky
LINKS
CREDITS
All: Jannis Newiadomsky
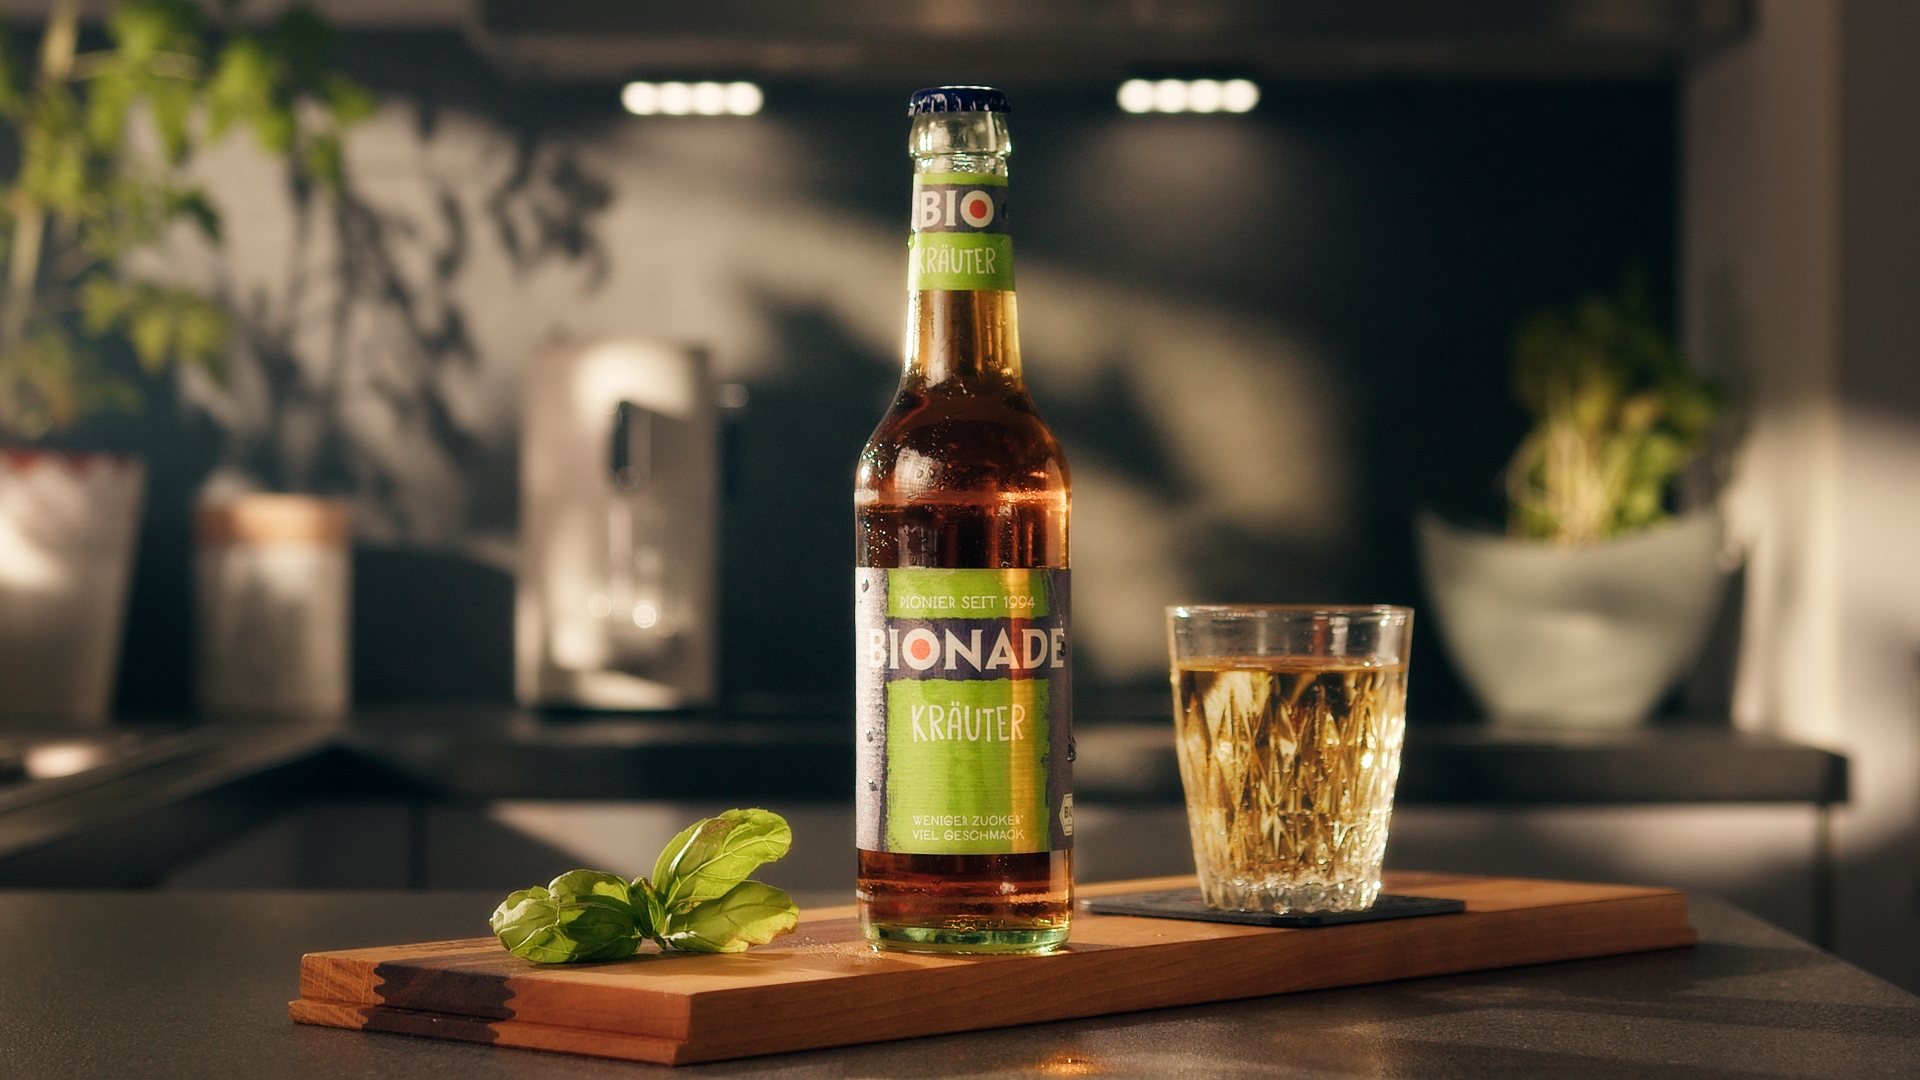
Spec Commercial Breakdown – Creating Depth & Atmosphere
This shot was born out of a quiet Saturday and a bit of creative boredom — a chance to experiment, refine, and shoot something just for the sake of it. I decided to stage a spec commercial-style bottle shot, using limited tools in a home environment, with a focus on lighting, texture, and small atmospheric touches.
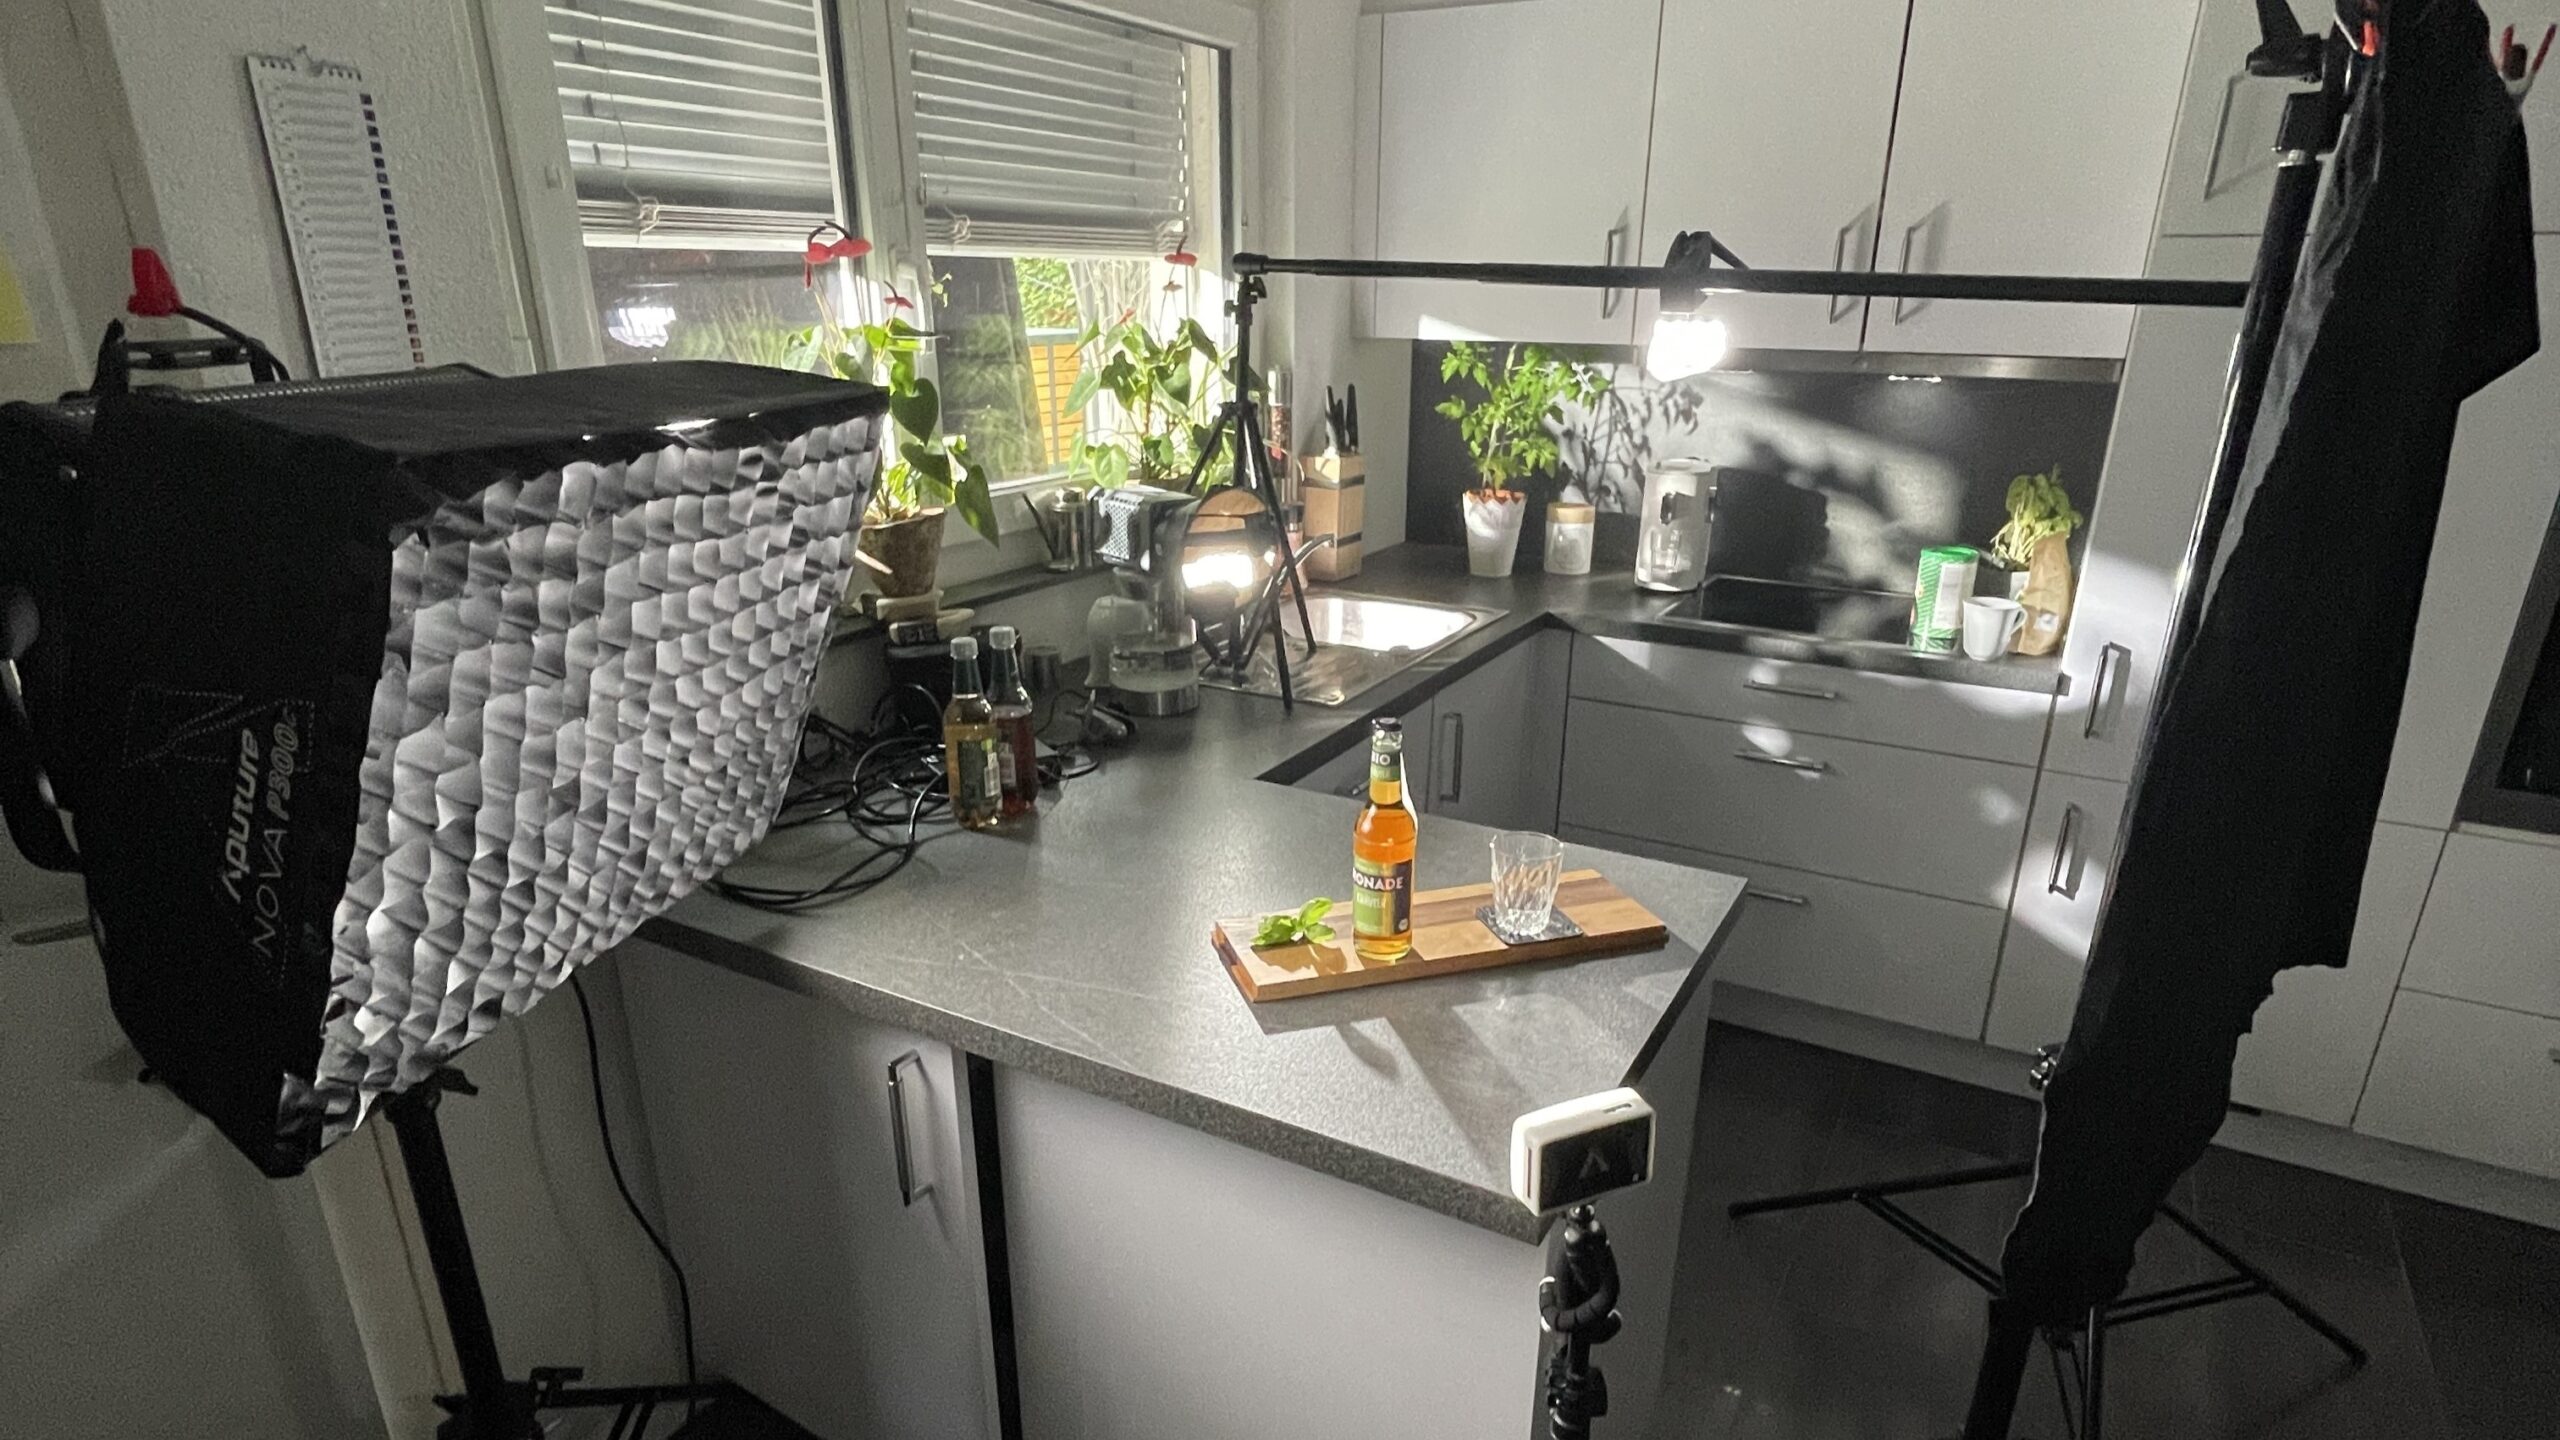
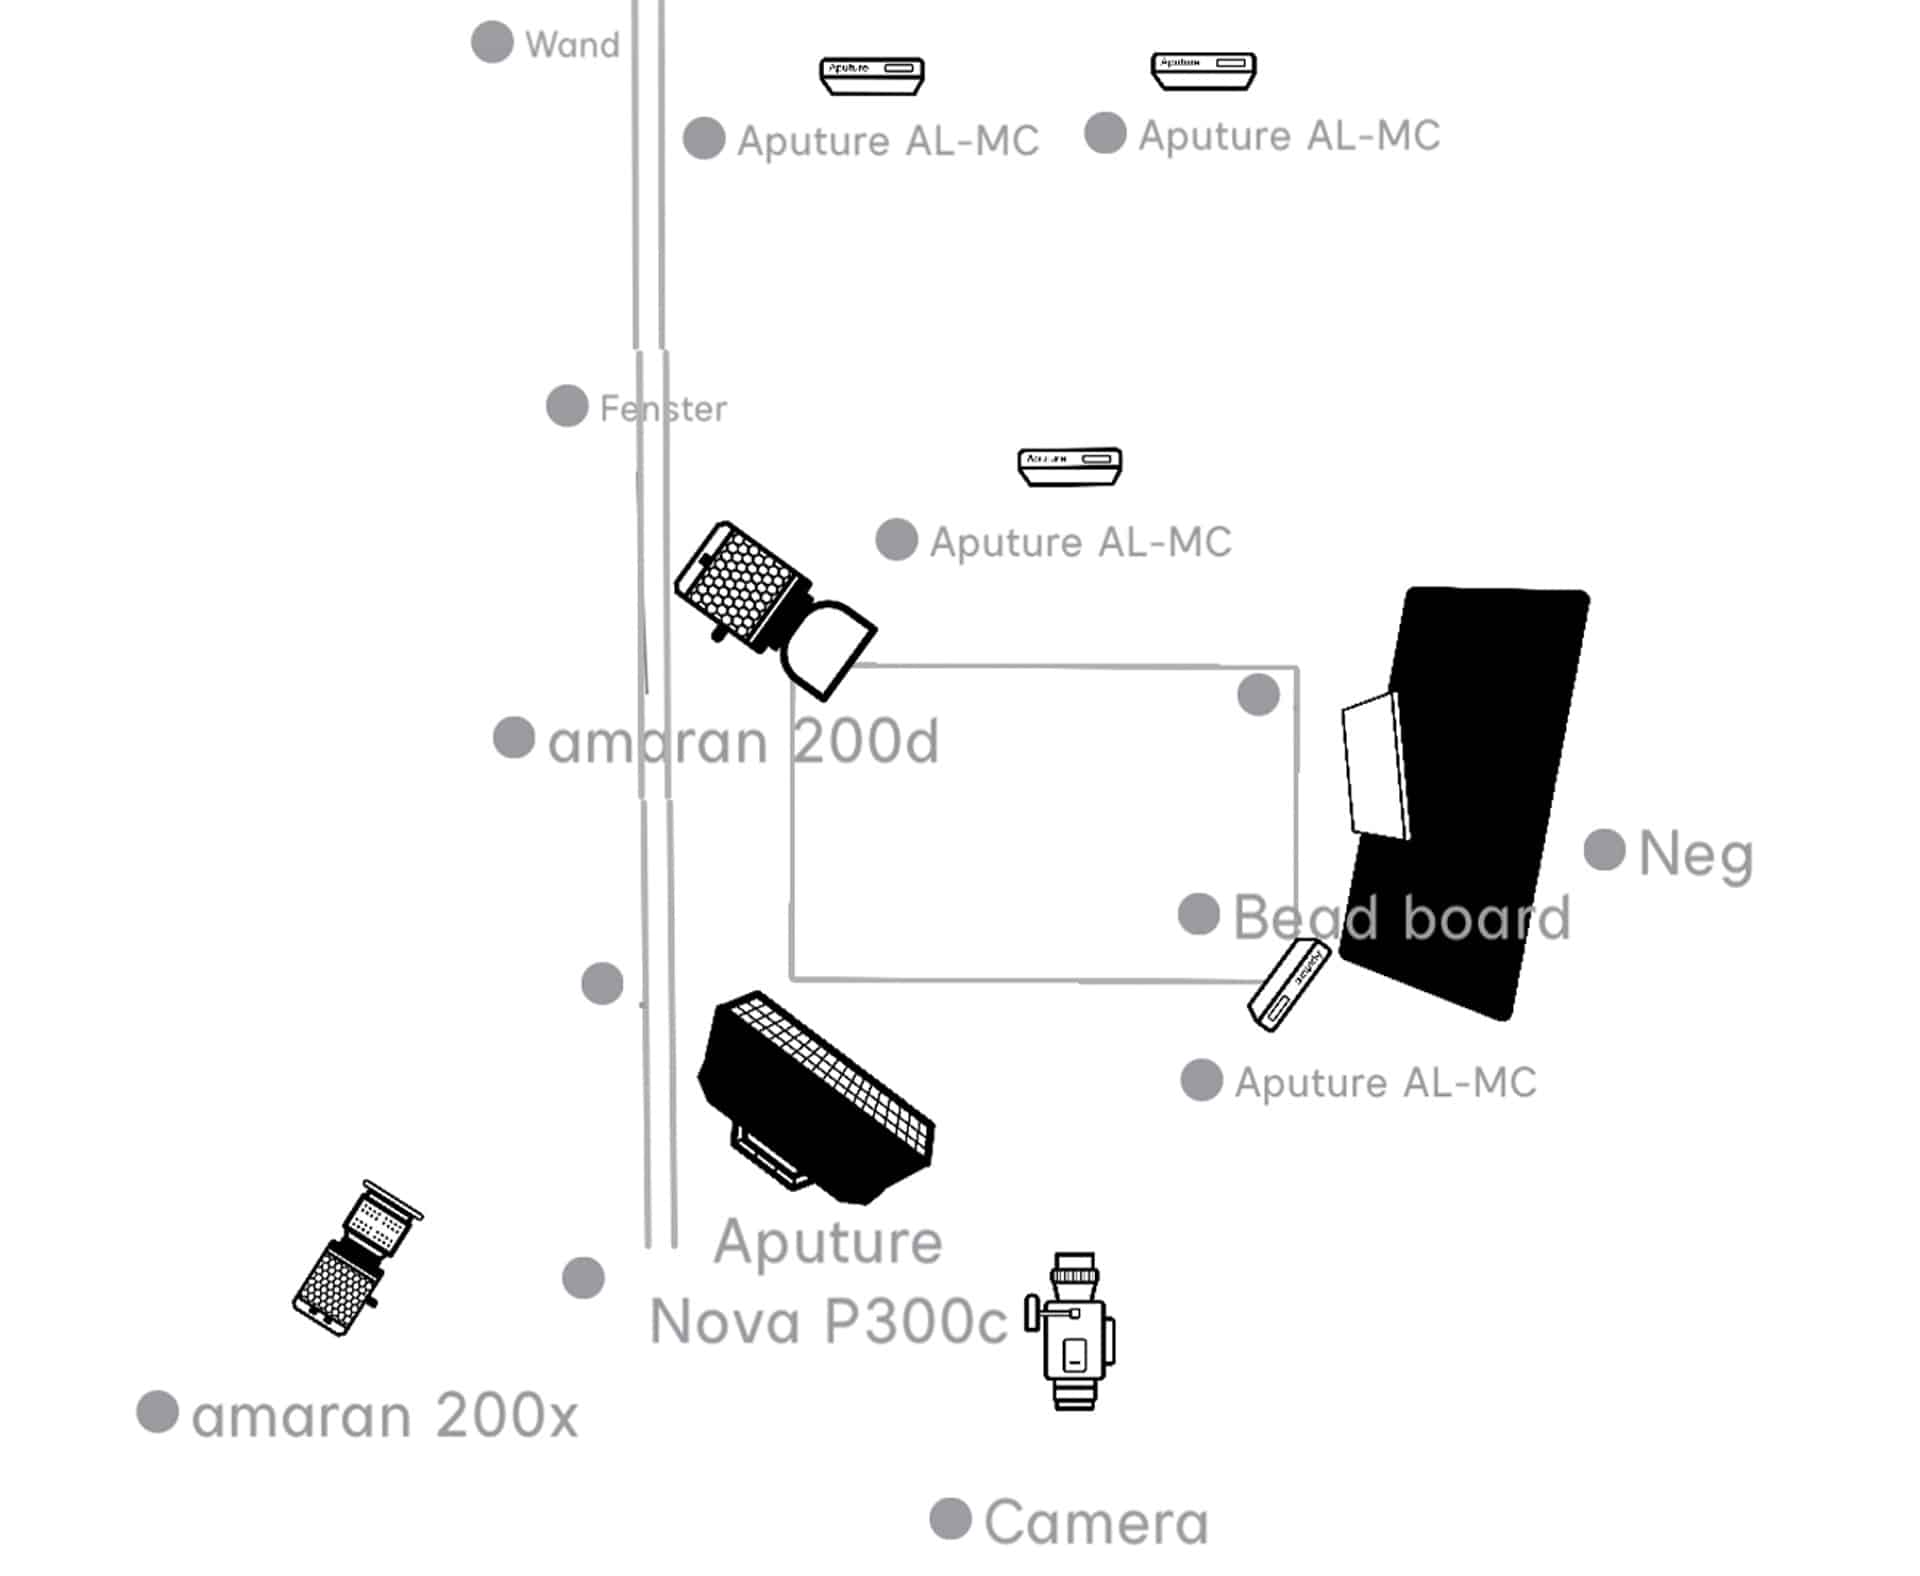
Lighting Setup & Environment
The scene was lit using several Aputure lights, layered to create both depth and dimension.
Backlight / Background Light: I started with an Aputure 200x outside the window, shooting through foliage to add organic texture to the background. The subtle diffusion of haze in the room helped give the light a bit more atmosphere, especially on the left side of the frame.
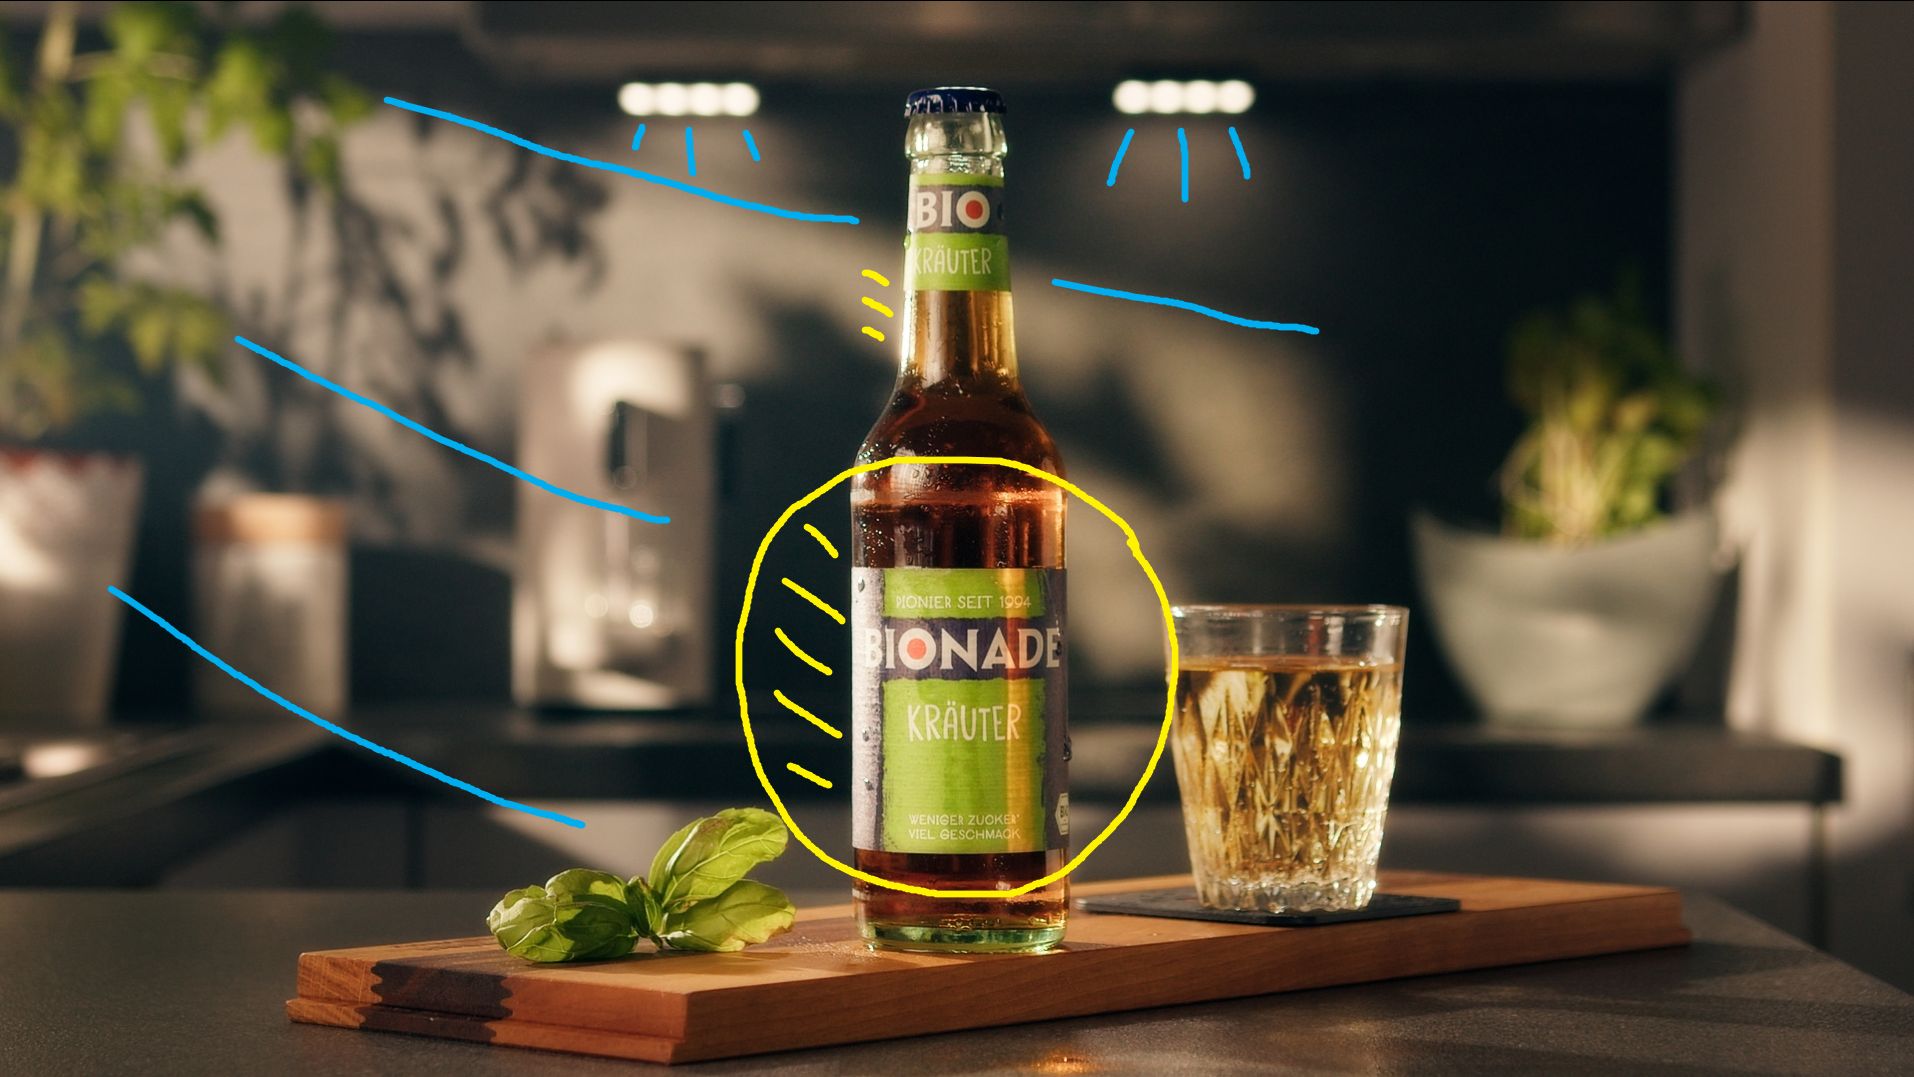
Key Light for the Bottle: An Aputure P300C with a grid was positioned camera left. The grid unfortunately made it into the bottle’s reflection — not ideal, but necessary to avoid flattening out the black tones in the background.
Backlight / Kicker: Another source (Aputure 200D) acted as a strong kicker from frame left, adding highlights and glow that gave the image more 3D separation. I enhanced this later in post with a touch of glow in the grade.
Fill Light: A tiny Aputure MC was placed camera right, just off the desk, to open up the shadows on the right side of the bottle and glass. The reflections it introduced were subtle but helped keep detail in those darker areas.
Practical Lights in Background: I used two more MCs as practicals. To keep the look natural, I removed the silicone diffusion from one of them — avoiding that typical Aputure MC «signature» glow. You can see the individual LED diodes, which makes the practical feel more like a believable kitchen or ambient light.
Bottle Highlight: A final MC was boomed in from above, aimed at the top-back edge of the bottle to prevent it from melting into the background and to bring out shape.
Shaping Contrast & Reflections
Contrast control played a major role. The white walls would’ve flattened the image, so I added negative fill to create shadow and depth. Ironically, I also used a beadboard — not to brighten shadows, but to introduce a small, controlled reflection that helped shape the bottle further.
An additional light in the sink (frame left) was used just to carve out another soft pocket of light in the image.
Post-Production Touches
In post, I added subtle glow and enhanced the specular highlights, which brought the overall image to life without overprocessing it. The goal was to maintain a cozy, warm, inviting tone while keeping crisp details in the glass, water droplets, and product texture.
This was a simple one-shot setup — but it was all about intentional lighting, clean layering, and shaping with nuance. Working with a small footprint and within a limited space challenged me to be more deliberate with placement and practical in execution.
Sometimes, small exercises like this are the best way to test ideas, tools, and new combinations without the pressure of a full production. It’s also a reminder that with just a few lights and careful control, you can achieve cinematic results in almost any space.
Spec Commercial Breakdown – Creating Depth & Atmosphere
This shot was born out of a quiet Saturday and a bit of creative boredom — a chance to experiment, refine, and shoot something just for the sake of it. I decided to stage a spec commercial-style bottle shot, using limited tools in a home environment, with a focus on lighting, texture, and small atmospheric touches.
Lighting Setup & Environment
The scene was lit using several Aputure lights, layered to create both depth and dimension.
Backlight / Background Light: I started with an Aputure 200x outside the window, shooting through foliage to add organic texture to the background. The subtle diffusion of haze in the room helped give the light a bit more atmosphere, especially on the left side of the frame.
Key Light for the Bottle: An Aputure P300C with a grid was positioned camera left. The grid unfortunately made it into the bottle’s reflection — not ideal, but necessary to avoid flattening out the black tones in the background.
Backlight / Kicker: Another source (Aputure 200D) acted as a strong kicker from frame left, adding highlights and glow that gave the image more 3D separation. I enhanced this later in post with a touch of glow in the grade.
Fill Light: A tiny Aputure MC was placed camera right, just off the desk, to open up the shadows on the right side of the bottle and glass. The reflections it introduced were subtle but helped keep detail in those darker areas.
Practical Lights in Background: I used two more MCs as practicals. To keep the look natural, I removed the silicone diffusion from one of them — avoiding that typical Aputure MC «signature» glow. You can see the individual LED diodes, which makes the practical feel more like a believable kitchen or ambient light.
Bottle Highlight: A final MC was boomed in from above, aimed at the top-back edge of the bottle to prevent it from melting into the background and to bring out shape.
Shaping Contrast & Reflections
Contrast control played a major role. The white walls would’ve flattened the image, so I added negative fill to create shadow and depth. Ironically, I also used a beadboard — not to brighten shadows, but to introduce a small, controlled reflection that helped shape the bottle further.
An additional light in the sink (frame left) was used just to carve out another soft pocket of light in the image.
Post-Production Touches
In post, I added subtle glow and enhanced the specular highlights, which brought the overall image to life without overprocessing it. The goal was to maintain a cozy, warm, inviting tone while keeping crisp details in the glass, water droplets, and product texture.
This was a simple one-shot setup — but it was all about intentional lighting, clean layering, and shaping with nuance. Working with a small footprint and within a limited space challenged me to be more deliberate with placement and practical in execution.
Sometimes, small exercises like this are the best way to test ideas, tools, and new combinations without the pressure of a full production. It’s also a reminder that with just a few lights and careful control, you can achieve cinematic results in almost any space.